I've moved my internet home!
Come on over to Tomatoes & Apple Pie to see what's new!

Monday, July 4, 2011
Saturday, April 16, 2011
Cake Mix Cookies
Sometimes you need something quick and easy, but don't want to a cake from a mix. Well, there are many things you can do with a cake mix besides make cake, and one of my favorites is to make cake mix cookies. You can use any flavor cake mix, and do anything you like as a mix in, or just keep them plain. Try chocolate chips, nuts, coconut, dried fruit.
Ingredients:
- 1 box cake mix (any flavor)
- 1 egg
- 1/2 c oil
- 1/4 c water
- 2 c mix ins
Preheat oven to 350. Mix all ingredients together in a bowl. Place spoonfuls onto lightly greased cookie sheet.


These cookies are light, fluffy and soft. So, how do you keep them that way? See in them all in the green bucket? One of these is not like the other ones...Yep, there's a piece of bread packed in with the cookies. This is a great way to use the ends of the bread that no one wants to eat anyway. Anytime you make cookies, after they are cooled put them in a sealed container with a piece of bread. The bread dries out, and the cookie miraculously stay nice and soft.
 I have
I have several more things I need to share with you, but I seem to have lost the camera cord, so once that is found be ready for a funfetti bake off, assorted craft items, and the best cake ever made (sweet & salty - chocolate with salted caramel filling, and a caramel ganache - don't worry if you mouth is watering, so is mine).
Sunday, March 27, 2011
Tie Onesie
We recently had a baby shower for a co-worker, Marcela.
Isn't she an adorable preggers? :)
 I wanted to make something cute and fun for the new little boy, but was limited on the supplies I had, so I went with adding ties to a couple of onesies.
 It was simple, and you can go bigger with patterned fabrics, or keep it simple.
First, I drew out a couple different size ties and cut them out to see which I like the best on the onesie. Then, I traced around my favorite on my fabric and cut it out. Next, get out the stitch withchery, and put cover the backside of the tie in it. Now comes the hardest part...flip it over and have it still fit properly without sticking out. It can be done, just takes a little coaxing.
Now, just follow the directions for the stitch witchery. Heat iron to wool setting, put damp cloth in between iron and shirt, and press down. Then, flip the shirt over and do the same on the back. Voila! You have a cute, custom onesie!


Isn't she an adorable preggers? :)


First, I drew out a couple different size ties and cut them out to see which I like the best on the onesie. Then, I traced around my favorite on my fabric and cut it out. Next, get out the stitch withchery, and put cover the backside of the tie in it. Now comes the hardest part...flip it over and have it still fit properly without sticking out. It can be done, just takes a little coaxing.
Now, just follow the directions for the stitch witchery. Heat iron to wool setting, put damp cloth in between iron and shirt, and press down. Then, flip the shirt over and do the same on the back. Voila! You have a cute, custom onesie!


Tuesday, March 15, 2011
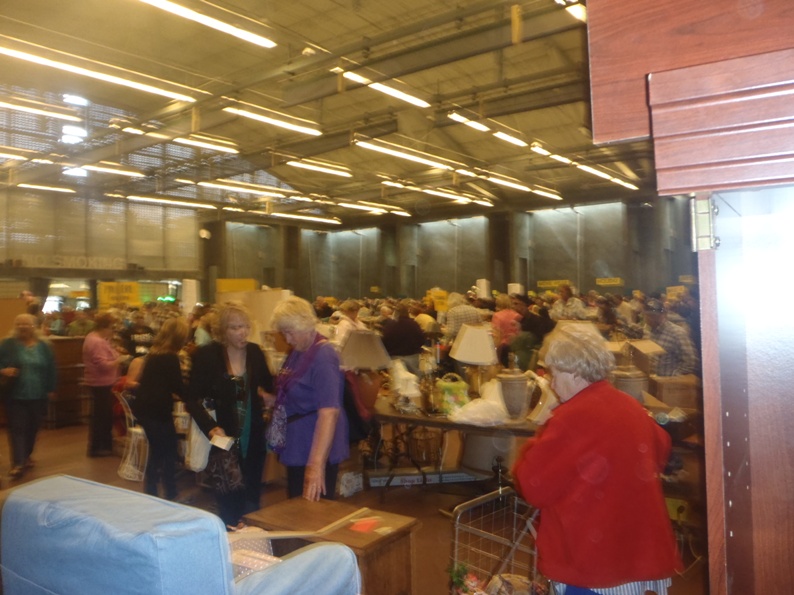
Rummage Sale finds

I did my part, gave them my $37 and got lots of goodies! :) The sale lasts two days, and I went on Saturday and spent about 4 hours inside finding fun things. I told myself I was done, but Sunday morning I just kept thinking about how everything was half price, so I went back and got some more.

The sale began at 9, but people start lining up as early as the night before. Yep you read that right, people camp out for the best deals. (Is a $10 bike worth it? I guess if you really want a bike...) I got there about 8:30 and got in line, the long, long line. Because it was going around the courtyard, I couldn't quite capture the length of the line in a picture, but I waited patiently.
Once inside, my first stop was the arts & crafts section, followed by the clothes. then meandering around the rest of the area.

I'm excited to start using the fabrics and the cutting mat. It's old and a little beat up, but I remember my mom having one of them, and when I saw it I knew I needed it! :)
Can't wait for next years sale!
Monday, March 14, 2011

Saturday, March 12, 2011
Mickey & Minnie

I thought I'd share things I have in my kitchen that I love.
First off, these Mickey & Minnie mugs. Now, I like Disney movies, and to go to Disneyland, but I'm no collector of Disney things. I try to stay out of the souvenir shops and save the money. However, a couple years ago I was at Disneyland and I saw these mugs and I fell in love with them. I tried to say no, but I ended up having to get them. I thought that they'd be great for sitting on the couch drinking hot chocolate on cold mornings.
I guess I wasn't thinking that I live in San Diego, and few mornings are cold enough to require drinking hot chocolate. And, I didn't think about the fact that even on cold mornings, hot chocolate (while delicious!) is rarely drunk around my house.
I guess I wasn't thinking that I live in San Diego, and few mornings are cold enough to require drinking hot chocolate. And, I didn't think about the fact that even on cold mornings, hot chocolate (while delicious!) is rarely drunk around my house.
But, I have still always loved these mugs! I have recently moved, and in the new place the cupboards have glass doors. I didn't know if I would like that at first (I have no pretty dishes), but I must say that I do enjoy being able to get a peek of these mugs anytime!

Stay tuned for my great rummage sale finds from today!
Tuesday, March 8, 2011
Woohoo!
I'm so excited to have a new little niece as of yesterday & can't wait to meet her! Everything was smooth, and very quick - a special thanks to the EMTs who could deliver a baby in an apartment lobby!
Jealous of my mom who is with them now, but I guess grandma gets first dibs. :) I suppose I'll just have to wait patiently and make some goodies for her.
Jealous of my mom who is with them now, but I guess grandma gets first dibs. :) I suppose I'll just have to wait patiently and make some goodies for her.
Saturday, March 5, 2011
Cookie Stuffed Cookies

It's here! Time for some cookie stuffed cookies!
Joselyn turned 30 this week and found this article at Serious Eats and asked if I could try it out. How I could I resist these awesome looking things?!They give a suggestion for a chocolate chip cookie recipe, but I decided to use my favorite from the Baked cookbook. Have you gotten this cookbook yet? If not, go check it out now! It became a fave of mine very quickly, and they have a good variety of stuff for different skill levels. I have loved everything that I've made out of it, and some of the things I've made several times! I'm sure your local library has it if you want to experiment with it before purchasing.
Anyway, onto the cookies!
I did chocolate chip cookie stuffed with Oreos (double stuff) and Girl Scout Cookie Samoas, but you really could do any cookie combo you liked. This recipe does have you refrigerate the cookie dough for 6 hours before baking, so plan ahead with that. I forgot about it, and started making the cookie at 7:00pm, so I had to assemble and bake the cookies in the morning, but fresh baked cookies make a Monday morning a lot more fun, so it worked out!
Ingredients:
- Whatever cookie you want as the inside (mine were the Oreo & Samoas)
- 2 cups all-purpose flour
- 1 teaspoon salt
- 1 teaspoon baking soda
- 1 cup (2 sticks) unsalted butter, softened
- 1 cup firmly packed dark brown sugar
- 1/2 cup granulated sugar
- 2 large eggs
- 2 teaspoons vanilla extract
- chocolate chips The Baked recipe calls for 2 1/3 cups of chocolate chips, but in reading about these stuffed cookies, it seems that too many chocolate chips overwhelm the flavor of the inside cookie and you can't taste it as well. So I did just over a cup of chocolate chips

1. In a large bowl, whisk the flour, salt, and baking soda together; set aside. <2>
2. In large bowl, beat butter and sugars <3>together until smooth and creamy.<4> Scrape down the bowl and add the eggs, one at a time, beating until each is incorporated.<5> The mixture will look light and fluffy. Add the vanilla and beat for 5 seconds.<6>

4. Using a spatula or wooden spoon, fold in the chocolate chips. <9 I promise there are chocolate chips in there!>
5.Cover the bowl tightly and put in the refrigerator for 6 hours. <10>

7. Take a scoop of cookie dough and place it on top of your inside cookie, and a scoop and place it on bottom. <11&12> Push the dough around the cookies and seal the edges so they are completly covered, then place on cookie sheet. <13>
8. Bake for 12-14 minutes & cool on wire rack. <14&15>
9. Enjoy!! <16>
These cookie are BIG, and delicious! I did one batch of cookie dough, and it made 19 of these goodies. Pick your favorite kinds of cookies and enjoy!
Monday, February 28, 2011
Ready to roll
I've moved.
Gotten everything (for the most part) unpacked.
The kitchen is ready to go.
I've begun baking again!
Later this week...cookie stuffed cookies. Yep, that's right and they were awesome!
Gotten everything (for the most part) unpacked.
The kitchen is ready to go.
I've begun baking again!
Later this week...cookie stuffed cookies. Yep, that's right and they were awesome!
Thursday, January 27, 2011
Yep

I <3 NPH!
Thanks for sharing ladies!
Sunday, January 23, 2011
Baked Explorations Doughnuts
So many things to post, so little time!
But, its not a bad thing I have lots to catch up on. I'm moving in a few weeks, so everything is being packed up and so not much craftiness or baking til everything is settled in.
Lets get back to it with something yummy I did just yesterday! It was the fiancee's birthday, and for a couple weeks he has been talking about how much he likes old fashioned doughnuts. Baked: Explorations has a recipe for Farm-Stand Buttermilk Doughnuts. If you haven't checked out the Baked and Baked: Explorations books, what are you waiting for?! They are fantastic!
 These doughnuts were also fantastic! I thought that they may come out a greasy mess, but not at all! They offer three topping options, but Thomas just wanted the regular glaze, so that is what we went with. At the bottom, I'll put the chocolate glaze and the cinnamon sugar (which is just that).
I was also a little worried about these turning out because I had to make some adjustments for not having everything on hand. I was completely out of regular sugar...and I know what you are thinking...how are you out of sugar?! I'll tell you, I had the buying schedule of sugar down pat, I knew how much I used baking, and how much Thomas used for Kool-Aid, I knew when we'd need a refill and just pick it up...but not anymore, because sugar now comes in a 4lb not a 5lb bag! So its all readjusting in realizing when i need to get more.
Ok, enough about the sugar. Anyway, I had to substitute powered for granulated sugar. I searched online, and found that you can do that by putting in 1.75 times the amount of powered sugar. Also, I am a bit frightened of frying. I've never really done it, and it seems intimidating, but I just went in for it!
Since there were only two of us eating the doughnuts, I opted to cut the recipe in half. I'm glad I did because there were more than enough that way. The halved recipe made 8 doughnuts plus some holes. I'm going to put the full recipe here in case you want to make more (and because I don't know how to write half of 3/4 cup).
Lets dig in!
Ingredients:
Dougnuts
3 1/2 cups all purpose flour
3/4 cup granulated sugar
1/2 teaspoon baking soda
2 teaspoons baking powder
1 teaspoon salt
1 teaspoon freshly grated nutmeg
1 teaspoon cinnamon
2 large eggs
3/4 cup buttermilk
1/4 cup sour cream
1/4 cup (1/2 stick) unsalted butter, melted and slightly browned and cooled
Vegetable oil for frying
Vanilla glaze
2 cups confectioners' sugar
1/4 cup whole milk
1 teaspoon vanilla paste or 1 1/2 teaspoons pure vanilla extract
Sprinkles to decorate (optional)
To make glaze, whisk all ingredients together.
Make the doughnuts
Line one baking sheet with parchment paper and another baking sheet with two layers of paper towels.(I just did a big plate with the towels, for draining)
In a large bowl, whisk together the flour,sugar,baking soda,baking powder, salt,nutmeg, and cinnamon.
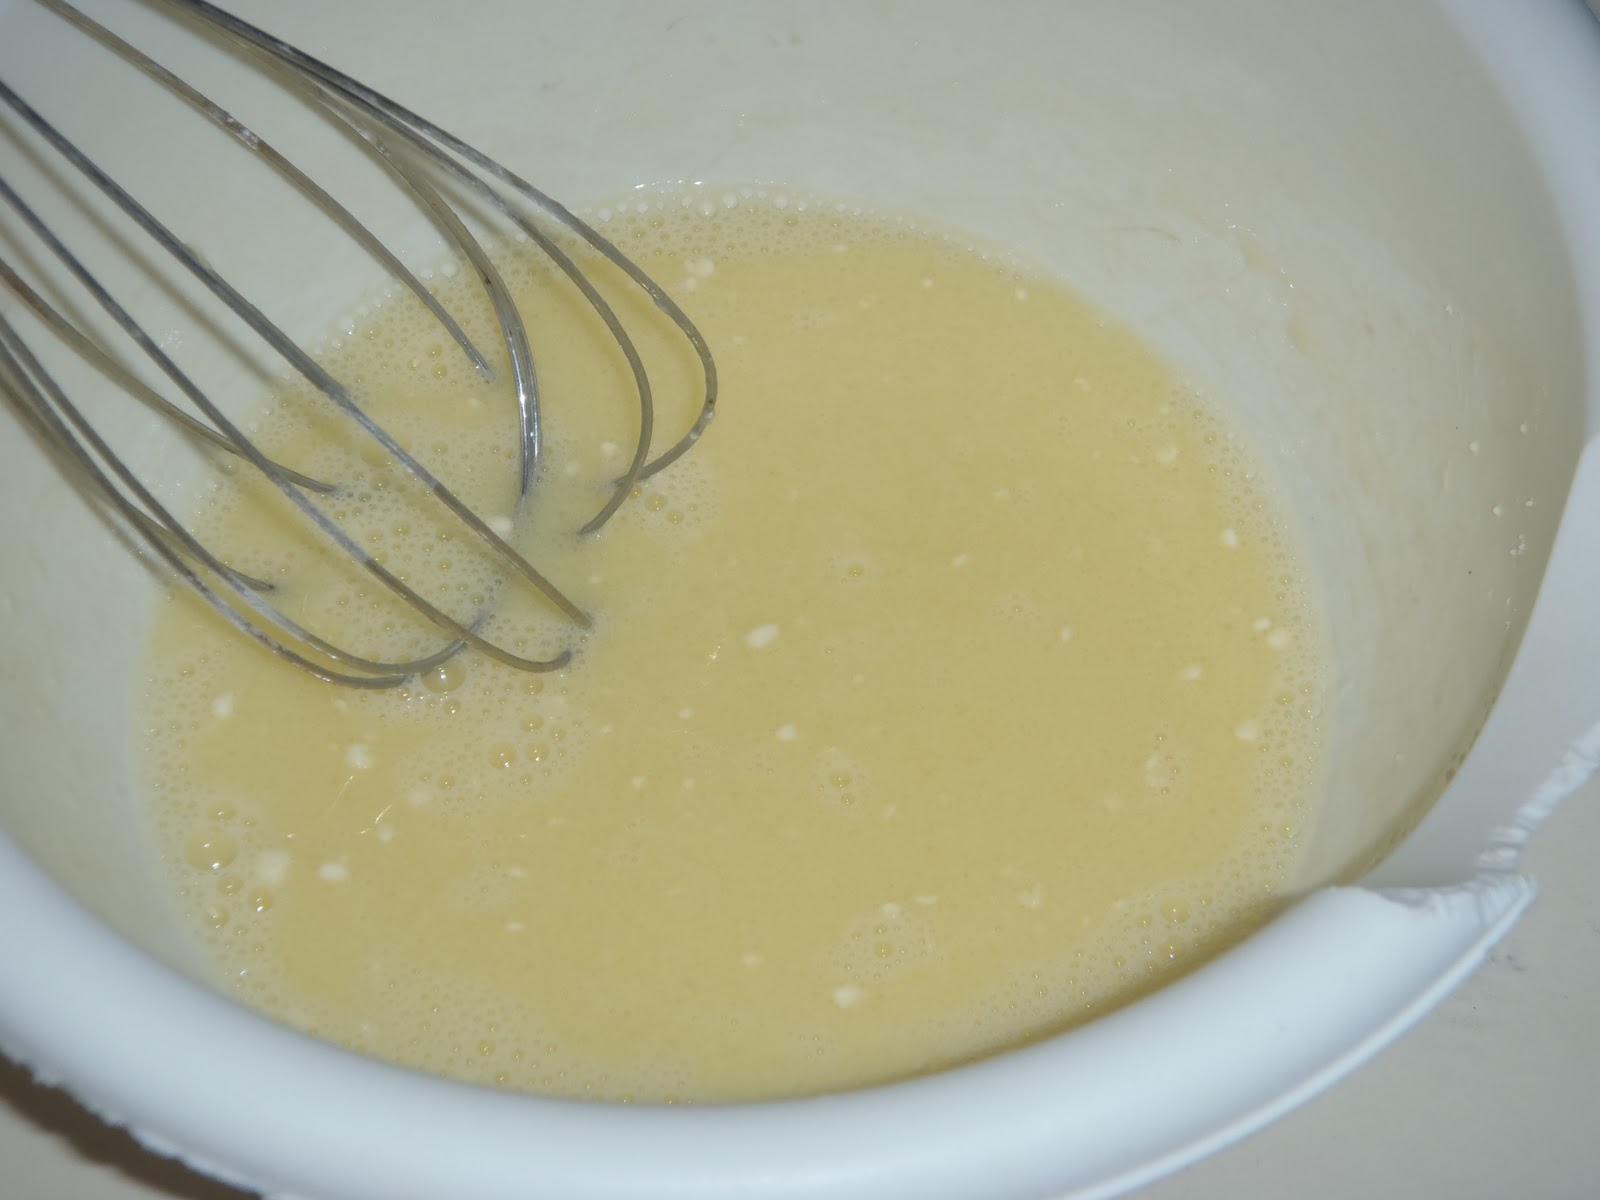
In a medium bowl, whisk the eggs, buttermilk, and sour cream until combined. Add the melted,cooled butter and whisk again.


But, its not a bad thing I have lots to catch up on. I'm moving in a few weeks, so everything is being packed up and so not much craftiness or baking til everything is settled in.
Lets get back to it with something yummy I did just yesterday! It was the fiancee's birthday, and for a couple weeks he has been talking about how much he likes old fashioned doughnuts. Baked: Explorations has a recipe for Farm-Stand Buttermilk Doughnuts. If you haven't checked out the Baked and Baked: Explorations books, what are you waiting for?! They are fantastic!

I was also a little worried about these turning out because I had to make some adjustments for not having everything on hand. I was completely out of regular sugar...and I know what you are thinking...how are you out of sugar?! I'll tell you, I had the buying schedule of sugar down pat, I knew how much I used baking, and how much Thomas used for Kool-Aid, I knew when we'd need a refill and just pick it up...but not anymore, because sugar now comes in a 4lb not a 5lb bag! So its all readjusting in realizing when i need to get more.
Ok, enough about the sugar. Anyway, I had to substitute powered for granulated sugar. I searched online, and found that you can do that by putting in 1.75 times the amount of powered sugar. Also, I am a bit frightened of frying. I've never really done it, and it seems intimidating, but I just went in for it!
Since there were only two of us eating the doughnuts, I opted to cut the recipe in half. I'm glad I did because there were more than enough that way. The halved recipe made 8 doughnuts plus some holes. I'm going to put the full recipe here in case you want to make more (and because I don't know how to write half of 3/4 cup).
Lets dig in!
Ingredients:
Dougnuts
3 1/2 cups all purpose flour
3/4 cup granulated sugar
1/2 teaspoon baking soda
2 teaspoons baking powder
1 teaspoon salt
1 teaspoon freshly grated nutmeg
1 teaspoon cinnamon
2 large eggs
3/4 cup buttermilk
1/4 cup sour cream
1/4 cup (1/2 stick) unsalted butter, melted and slightly browned and cooled
Vegetable oil for frying
Vanilla glaze
2 cups confectioners' sugar
1/4 cup whole milk
1 teaspoon vanilla paste or 1 1/2 teaspoons pure vanilla extract
Sprinkles to decorate (optional)
To make glaze, whisk all ingredients together.
Make the doughnuts
Line one baking sheet with parchment paper and another baking sheet with two layers of paper towels.(I just did a big plate with the towels, for draining)
In a large bowl, whisk together the flour,sugar,baking soda,baking powder, salt,nutmeg, and cinnamon.
In a medium bowl, whisk the eggs, buttermilk, and sour cream until combined. Add the melted,cooled butter and whisk again.

Make a well in the center of the flour mixture and pour the liquid ingredients into the well. With a rubber spatula, slowly fold the flour into the liquid center until the mixture forms a sticky dough.(My dough was really wet, so I added additional flour until I could touch it and not have everything stick to me)


Saturday, January 1, 2011

Subscribe to:
Comments (Atom)