Sunday, June 27, 2010

Pickle Cupcakes

Yep, you read it right! Pickle cupcakes! :) One of my favorite blogs is Cupcake Project and awhile ago one of her recipes was in People magazine, and I saw it and thought I wanted to try it out. Then someone sent me a link to 10 awesome cupcakes, and these were one of them so I knew that these just had to be made. Now, it seemed to me that there is only one occasion that you can make pickle cupcakes for...a baby shower! We were having a baby shower at the office, and so I demanded that I was going to make these and make them I did.Before we get into the actual making of the cupcakes, I have to show these, aren't they they cutest little pickles you have ever seen? We debated if they were meant for like a kid to take to school, and decided only a mean parent would send their kid to school with these, because after this there is no way that you wouldn't end up smelling like pickles for the rest of the day. But, they are adorable.
So here we go. I'd like to note that, no I'm not a big pickle fan. I don't mind them when they are on something, but I'm not one to just grab one out of the jar and have a snack. I just found these intriguing. Also, I decided to make these in a mini form, I thought that a pickle cupcake might be best enjoyed in small portions.Pickle Cupcakes from Cupcake ProjectMakes 8 cupcakes
  • 1 C flour
  • 3/4 t baking powder
  • 1/4 t baking soda
  • 1/2 t ground dill
  • 1/2 t salt
  • 1/4 t onion powder
  • 6 T butter, room temperature
  • 1/3 C sugar
  • 1 egg
  • 1/3 C sour cream
  • 1/3 C dill pickle juice (the liquid from the pickle jar)
  • 1/3 C finely chopped dill pickles
  1. Whisk flour, baking soda, baking powder, dill, salt, and onion powder in a medium-sized bowl.
  2. Beat butter and sugar in a large bowl until light and fluffy.
  3. Beat in eggs and sour cream until blended.
  4. Alternately fold in flour mixture and pickle juice, beginning and ending with the flour.
  5. Fold in the chopped pickles.
  6. Fill cupcake liners 3/4 full.
  7. Bake at 350 F for about 25 minutes or until a toothpick comes out of the cupcake clean. (For the mini cupcakes, I baked for about 15 minutes and they were perfect)
What do you top a pickle cupcake with? At The Cupcake Project she recommended vanilla ice cream, and I had to agree with that. The final verdict? Well, to me they were little pickle-y cups. They weren't as strong and vinegary as pickles, but definitely had that distinct dill flavor. People who were pickle lovers wanted more, and people who hated pickles hated these. :) The cupcake itself sure isn't a sweet dessert, but is more of a savory muffin flavor.

Tuesday, June 22, 2010

Some creativity for the end of Friends

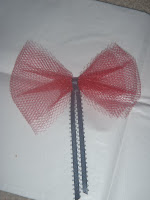
So I have been rewatching Friends. That has to be one of my favorite all time shows. I just crack up every time. Well I recently made it through all the seasons, and as I was watching season 10 and knowing it was coming to an end I needed something to keep me busy while I was watching. So I filled my living room floor with flowers, feathers, and tulle and made some hair clips and pins.

Monday, June 21, 2010

Apple Pie a la Katrina

Apple Pie...
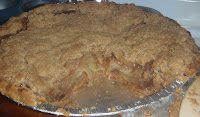
Thomas loves apple pie. I do not. I've never been a fan of it, or any baked fruit really. But he still asks me to make apple pie all the time. Well, we bought too many apples the other day so I broke down and finally made one. My little sister makes an apple pie Thomas has always liked, and it is pretty simple so I asked her for the recipe. Here it goes. (I used a pre made crust...one of these days soon I'll get to making my own, just need to get a pastry blender...)

Pie Crust
(or you could use a pre-made one)
1 1/2 cup all purpose flour
1/2 teaspoon salt1/2 cup shortening
4-5 tablespoons cold water (we actually used like 7 or 8 at least)
stir together flour and salt. cut in shortening with pastry blade or 2 knives until pieces are the size of small peas. sprinkle water over one tablespoon at a time tossing mixtyre after each addition. form into a ball. flatten dough on lightly floured surface. roll 1/8 inch thick from center to edge. use spatula to fold into fourths, lift and place in ungreased pie pan. cut crust about 1/2 inch from outside of pie pan. fold over and crimp edges. (so we just rolled it out and put it in the pan so it looked like a crust. made sure there was like 1/2 an inch above the pan, folded it over, and pinched it by using your thumb and index finger with your other index finger between them) fill and bake.

Apple Filling
6 granny smith apples
1-1 1/2 teaspoon cinnamon
2 tablespoons lemon juice
1 cup sugar
1/4 cup flour
In a plastic bag place sugar, cinnamon, flour, and lemon juice, mix well. peel apples and slice thinly. Add apples to mix and thoroughly coat (hands work best). Put apples into 9 in uncooked pie crust.
(Note, I used a 9 inch deep dish crust, and it was FULL)

Crumb Topping
1 cup flour
1/2 cup softened butter
1/2 cup brown sugarMix together and pat on top of apples
So last time she made this it was completely burnt, so she was a little afraid to tell me how long to cook it. This is what she said, "so im a little afraid to tell you how to cook it because i burned it last time... it cooks at 350 but obviously not for an hour and a half. i think it might actually be like 45 minutes but i would keep an eye on it."Indeed, it cooked at 350 for about 50 minutes. Be sure to put this thing on a cookie sheet, all that apple sugary goodness will leak out.

Friday, June 18, 2010

Tuscaloosa Tollhouse Pie

Another hit from the Baked Cookbook!This is a yummy pie, and is almost just a big chocolate chip cookie. In the cookbook, they suggest when eating the pie the next day to pop your slice in the microwave for 15 seconds and add some ice cream. I must say that I concur!
So here it goes

Baked’s Tuscaloosa Tollhouse Pie

  • 1/2 recipe pie dough, chilled
  • 1/2 cup all-purpose flour
  • 1/2 cup sugar
  • 1/2 cup firmly packed brown sugar
  • 2 eggs, room temperature
  • 3/4 cup (1 1/2 sticks) unsalted butter, softened and cut into pieces
  • 1 tb whiskey (I used Southern Comfort)
  • 3/4 cup walnuts, toasted and chopped
  • 1 1/4 cups chocolate chips

On a lightly-floured surface, roll out dough to form a 12-inch round. Press into a pie dish, folding under edges. Freeze crust while you make the filling.

Preheat oven to 350 degrees F.

In a bowl, whisk together flour and sugars; set aside.

Fit an electric mixer with its whisk attachment, and beat eggs on high speed until foamy, about 3 minutes. Switch to the paddle attachment, and mix in flour and sugars on low. Turn mixer to high and beat for 2 minutes; add butter and beat on high until combined. Scrape down sides, add whiskey, and beat on high for another minute, then fold in walnuts and 3/4 cup of chocolate chips.

Pour filling into chilled pie shell, scatter remaining 1/2 cup chocolate chips across the top, and bake for 25 minutes. Cover edges of crust with foil and bake for another 25 minutes; remove from oven when inserted knife or pie tester comes out clean. Cool on a cooling rack completely (at least one hour) before serving.

I must admit, I haven't gotten to the point of making crusts. One of these days I'm just going to make a bunch at once, but just not yet. So I did just use a frozen crust, but it came out just fine. :)

Tuesday, June 15, 2010

Mirror Mirror on the wall

I've been needing a mirror at my desk, because often people sneak up behind me and I don't realize that they are there. So, in an effort to not be rude and ignore them as they stand there or to be scared when they just pop up, I've wanted a mirror to see what is going on behind me.

When I as at Micheal's last week I found a basic unfinished mirror that I got to jazz up a bit! A few pictures, some letters, and a bit of modge podge later and I was set!I first covered the entire thing in pink paper. Then I added the pictures and letters on. The letters were originally brads, and i just cut off the prongs on the back.Then covered the entire thing in a couple layers of modge podge and done!

Monday, June 7, 2010

Hair piece

So many cute headbands out there, and over and over again I want to get one, but could never decide what to get. Sometimes they are really an investment to buy one. So, what's a girl to do? Make her own of course!

I was at Wal Mart, and discovered that they are getting rid of their fabric there. A tragedy for sure, where else am I suppose to buy cheap experimental fabrics for things...oh well. So, they had a bunch of tulle of different sizes left for CHEAP. So I picked some up, as well as a few basic headbands and came home to experiment.I started with the tulle, a glue gun, and some feathers.I put a piece of felt centered in the tulle so the glue would have something to stick to, and then started putting down the feathers. Then I grabbed a big button I had and glued it in the middle.
I then attached it to a headband.To keep it on the headband, I just took another round of felt and glued it to the one already attached. I forsee many more of these in the future

Flamingos!

I'm not a fan of birds, with two exceptions....peacocks and flamingos. And I don't think you can even really classify them as birds. :)
For my birthday, my awesome coworkers had a Martha themed potluck. Everyone made something yummy, and wore an apron to the event. Many great things were made, but I only have a picture of one, these awesome cupcakes. My awesome friend Joselyn made these adorable little flamingos.

Now, I think the best part is the flamingo is totally edible. It's a dipped pretzel for the neck, and the head is a jellybean with half a banana runt. I loved them!
There were some other pretty awesome creations for the lunch, and if I get some pictures I'll be sure to share.

Thursday, June 3, 2010

Chocolate Pecan Pie

Another hit from the Baked Cookbook!
Chocolate Pecan Pie...I was short on time, but really wanted to make this, so I ended up using a premade crust for it. And of course, one pie wasn't enough so I doubled the recipe and made two! :) It was a good thing I did because they were quickly consumed at the office I didn't have any bourbon, so I opted out of using that, and it came out just fine.

Baked - Chocolate Bourbon Pecan Pie
1 ball of Classic Pie Dough (below), chilled (Recipe below, or just cheat like me and buy it)
2 cups pecan halves, toasted
3 large eggs
¾ cup light corn syrup
3 tbsp. sugar
4 tbsp. firmly packed dark brown sugar
2 tbsp. unsalted butter, melted
Pinch of salt
1 tsp. pure vanilla extract
3 tbsp. bourbon
1 cup (6 oz.) semisweet chocolate chips
Dust work surface with a sprinkling of flour. Unwrap the ball of chilled dough and put it directly on the work surface. Roll out into a 12-inch round. Transfer the dough to a pie dish and carefully work it into the pie dish, folding any overhang under and crimping the edge as you go. Wrap and freeze the crust until firm, about 2 hours, or up to 3 months.Preheat the oven to 325 degrees F. Coarsely chop ¾ cup of the pecans. Set aside.In a large bowl, whisk the eggs until combined. Add the corn syrup, sugars, butter, salt, vanilla, and bourbon. Whisk again until combined. Stir in the chopped pecans and set the filling aside.
Spread the chocolate chips evenly along the bottom of the frozen pie shell. Slowly pour the filling on top of the chocolate chips. Arrange the remaining 1 ¼ cups pecan halves on top of the filling.

Bake in the center of the oven for 30 minutes, then cover the edges of the crust loosely with the aluminum foil and bake for another 30 minutes. Test the pie by sticking a knife in the center of the filling. If the knife comes out clean, the pie is done. If the knife comes out with clumps of filing sticking to it, bake for another 5 minutes and test again.
Cool the pie on a wire rack and serve warm or at room temperature. The pie can be stored in the refrigerator, tightly covered, for up to 2 days.

Classic Pie Dough
Yield: 2 balls of dough, enough for 2 (9-inch) single-crust pies or 1 (9-inch) double-crust pie

3 cups all-purpose flour
1 tbsp. sugar
1 tsp. fine salt
1 cup (2 sticks) cold unsalted butter
¾ cups ice cold water

In a medium bowl, whisk together the flour, sugar, and salt together.

Cut the cold butter into cubes and toss the cubes in the flour mixture to coat. Put the mixture in the bowl of a food processor and pulse in short bursts until the pieces of butter are the size of hazelnuts.

While pulsing in quick, 4-second bursts, drizzle the ice water into the food processor through the feed tube.

As soon as the dough comes together in a ball, remove it from the food processor and divide it into two equal balls, Flatten to a disk and wrap each disk first in parchment paper and then in plastic wrap. Refrigerate the disks until firm, about 1 hour. (The dough can be refrigerated for up to 3 days or frozen for up to 3 months. Thaw in the refrigerator before proceeding with the recipe.)